12 Vegetables You Should Be Growing In Buckets!
Imagine a sunny balcony with cherry tomatoes hanging from a 5-gallon pot. Or crisp radishes peeking out of a shallow container. That’s the magic of bucket gardening. No big backyard? No worries. Thousands of gardeners have made small spaces into mini-farms.
They’ve shown you can grow fresh veggies in even a 1-gallon bucket. Let’s start your journey to growing your own food today.
Table of Contents
Key Takeaways
- Tomatoes thrive in 5-gallon buckets, needing just 1 plant per container.
- Radishes pop up in 20 days, perfect for impatient gardeners.
- Lettuce and spinach fit small 2-gallon buckets, ideal for tight spaces.
- Buckets let you grow 12 veggies, from 6-inch lettuce to 48-inch eggplants.
- Over 5005 readers have shared this method—your turn to try it!
Why Bucket Gardening Is Perfect for Growing Vegetables
Urban living doesn’t mean you can’t grow fresh vegetables. Bucket gardening turns tiny spaces into productive Small Vegetable Gardens. Even a balcony or patio becomes a thriving food source. These portable gardens adapt to any environment, so you can harvest greens, herbs, and more without a backyard.
Space-Saving Benefits for Urban Gardeners
A 5-gallon bucket holds a thriving tomato plant or a row of carrots. Small Vegetable Gardens in buckets maximize limited spaces. Shallow pots work for lettuce or herbs, while deeper containers accommodate beans or peppers. No yard? Balconies or rooftops become your garden. Even a windowsill can host basil or radishes.
Mobility and Versatility of Bucket Gardens
With Growing Vegetables In Pots, you control where your plants grow. Move containers to sunny spots or indoors during cold snaps. Dwarf tomato varieties thrive in 5-gallon buckets, and herbs like mint stay contained. Wheels on large pots let you adjust layouts effortlessly. Protect plants from pests by lifting containers off soil.
Cost-Effectiveness Compared to Traditional Gardens
Buckets cost less than raised beds or soil prep. Reuse old buckets or buy affordable plastic containers. A 5-gallon pot and potting mix start small gardens for under $20. Dwarf varieties like patio tomatoes give big harvests without big budgets. Skip weeding and soil testing—just focus on your plants!
The Advantages of Growing Vegetables in Containers
Gardening in containers opens up new ways to Growing Veggies even when space is limited. With Vegetables In Pots, you can control the soil quality. Say goodbye to rocky or clay-heavy ground.
Mix nutrient-rich potting soil and compost to create the perfect growing environment. Tailor it to each plant’s specific needs.
| Plant Type | Soil Depth Required | Examples |
|---|---|---|
| Shallow-rooted | 6–9 inches | Lettuce, radishes, green onions |
| Moderate-rooted | 12–18 inches | Peppers, broccoli, kale |
| Deep-rooted | 18–24 inches | Tomatoes, potatoes, squash |
Containers make pest management easier. If you spot pests, just move the plant. This way, you can keep your garden pest-free.
Containers also help extend your growing season. Move them indoors during frost or to shaded areas when it’s too hot. This way, you can keep growing even when the weather changes.
Even if you have mobility issues, containers make gardening easier. Adjust the pot heights to avoid bending. Place them where they’re easy to reach.
- Use slow-release fertilizer (8–10 weeks of nutrients)
- Water daily in small pots; mulch with straw or compost to retain moisture
- Provide 6–10 hours of sunlight for fruiting plants like tomatoes
With these benefits, Growing Veggies in containers can turn any balcony, porch, or patio into a productive garden. Start small, choose the right pot size, and enjoy fresh produce all year!
Essential Supplies for Your Bucket Vegetable Garden
Starting your Vegetable Garden DIY project needs the right tools and materials. Let’s look at what you need to grow healthy plants in buckets.
Choosing the Right Buckets and Containers
Choose containers that are at least 12 inches wide and deep. Five-gallon buckets are great for tomatoes or peppers. Using clean, food-safe plastics or repurposed pots can save money.
Avoid dark-colored containers in hot climates to prevent overheating soil. Check the depth of your containers based on the plants you want to grow. Carrots need 12 inches, while lettuce can grow in 6-inch pots.
Drainage Solutions for Healthy Plants
Drill ½-inch drainage holes in the bottom of every container. Add 1–2 inches of gravel or broken pottery shards to improve airflow. Elevate containers on bricks or cinder blocks to enhance drainage further.
Proper drainage prevents root rot and ensures oxygen reaches roots. This is a key step in Food Gardening success.
Tools and Equipment You’ll Need
Basic tools include:
- Hand trowel and garden gloves
- Watering can or spray bottle
- Pruning shears for trimming
Optional upgrades:
- Self-watering planters to reduce watering frequency
- Organic fertilizer like fish emulsion
- Soil moisture meters for accuracy
Homemade soil mixes can save money. Mix compost, peat moss, and perlite for a nutrient-rich blend. Avoid using garden soil, as it compacts easily in containers.
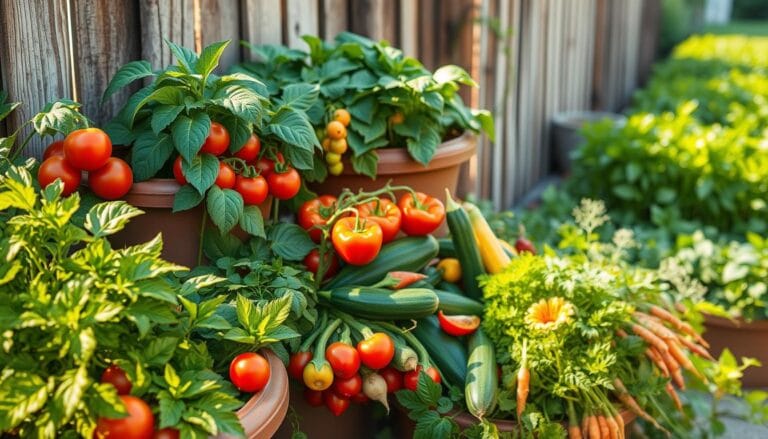
Top 12 Vegetables That Thrive in Bucket Gardens
Make the most of your backyard by picking these 12 vegetables. They grow well in containers, giving you fresh food in small spaces. Let’s see how each one does in buckets.
Leafy Greens: Lettuce, Spinach, and Kale
Leafy greens do great in small containers. Lettuce is ready in 30 days, perfect for quick salads. Spinach and kale need 6-inch pots and some shade. Plant seeds every two weeks for a steady supply.
Root Vegetables: Carrots, Radishes, and Beets
For root veggies, use deeper pots (10-12 inches). Carrots need loose soil and are planted 1 inch deep. Radishes are ready in 21-30 days, great for small spaces. Beets need full sun and 12-inch pots for their roots.
Nightshades: Tomatoes and Peppers
Tomatoes like Cherry Baby or Husky Cherry do well in five-gallon buckets. Support the plants with stakes. Peppers need warm soil and big pots with good drainage. Pick varieties like Sweet Gypsy for smaller growth.
Herbs and Alliums: Basil, Scallions, and Chives
Grow these in mixed containers for flavor and to keep pests away. Basil needs lots of sun. Scallions and chives grow in clusters in 8-inch pots. Plant them with flowers to attract pollinators.
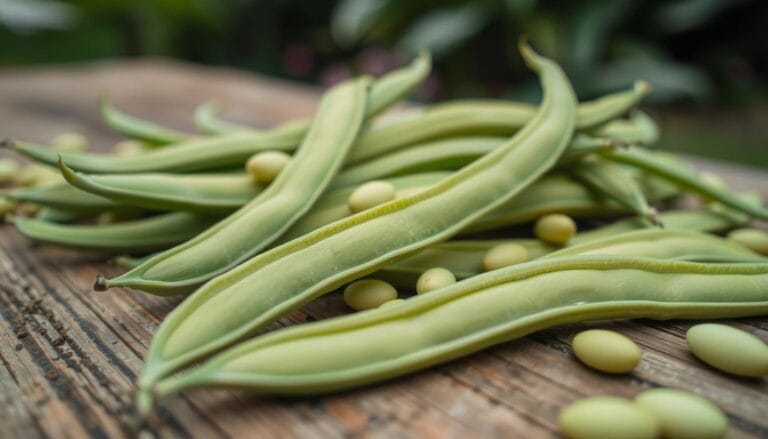
Cucurbits: Cucumbers and Zucchini
Use 12-15-inch pots for cucumbers and add trellises for support. Zucchini needs 18-inch pots. Water them well but avoid getting the leaves wet to prevent rot.
Soil Mixtures and Fertilizers for Container Vegetables
Healthy Container Vegetables need the right soil and nutrients. Don’t use garden soil—it can harm roots. Instead, create your own Vegetable Garden DIY mix with these ingredients:
Start with 2 parts compost, 1 part coconut coir (soaked for 15 minutes), and 1 part vermiculite/perlite (3-6mm). Add 1 cup of worm castings. This mix ensures good drainage, nutrients, and air flow.
| Component | Amount | Role |
|---|---|---|
| Compost | 2 parts | Nutrient source |
| Coconut Coir | 1 part | Moisture retention |
| Vermiculite/Perlite | 1 part | Aeration and drainage |
| Worm Castings | 1 cup | Slow-release nutrients |
For 12-inch containers, start with 4″ peat, 4″ vermiculite, 2″ worm castings, and 2″ compost. This “Pea-Ver-Comp” mix helps plants grow steadily. Check the pH at planting and store leftovers in a sealed container.
Fertilize weekly with diluted liquid feeds. Fish emulsion is excellent for tomatoes. Use organic options like compost tea or synthetic balanced fertilizers. Switch between types to avoid nutrient gaps.
Reuse compost by adding fresh ingredients yearly. Rotate crops to prevent soil depletion. Adjust mixes based on your Vegetable Garden DIY space—this flexibility ensures every bucket thrives!
Watering Techniques for Bucket-Grown Vegetables
Learning how to water is crucial for success.
Signs of Overwatering and Underwatering
Watch for these signs to catch problems early:
- Overwatering: Yellow leaves, root rot, or very wet soil
- Underwatering: Leaves that droop, dry soil, or stems that break easily
To check soil moisture, stick your finger 2 inches into the soil. If it’s dry, water until water drains from the pot’s bottom.
Self-Watering Systems for Busy Gardeners
These options save time:
- Ollas: These are buried clay pots that slowly release water.
- Drip Irrigation: It uses 1/4″ tubing with emitters to save up to 50% water.
- PVC Grids: Create a network for self-watering with ¾” Schedule 40 PVC.
Seasonal Watering Adjustments
Change your watering schedule with the seasons and plant types:
| Plant Type | Cool Climate | Hot/Arid Climate |
|---|---|---|
| Tomatoes/Peppers | 45 min, 2x/week | 75 min, 2x/week |
| Squash | 30 min, 2x/week | 90 min, 2x/week |
| Cucumbers | 45 min, 1x/week | 90 min, 2x/week |
| Leafy Greens | 30 min, 3x/week | 60 min, daily |
In summer, small pots (under 10″) might need daily watering. Always water in the morning to prevent diseases.
Protecting Your Bucket Vegetables from Pests and Diseases
Growing Veggies in containers helps avoid soil pests. But, flying insects like aphids and slugs need attention. Food Gardening in buckets lets you control the environment. Regular checks and proactive steps keep plants thriving.
- Use lightweight row covers to block pests like flea beetles from attacking eggplants and brassicas.
- Plant nasturtiums nearby to deter cabbage moths and attract beneficial insects.
- Mix neem oil with water to treat aphids and mites—apply every 7–10 days.
- Set beer traps in shallow dishes to lure and drown slugs overnight.
95% of insects in gardens are harmless or helpful, so avoid broad-spectrum pesticides. Ladybugs and lacewings eat aphids, so encourage them by avoiding chemical sprays. After harvest, disinfect tools with a 10% bleach solution to prevent disease carryover.
Rotate crops every three years to break pest cycles. Avoid planting tomatoes in the same spot for three seasons. Choose disease-resistant varieties labeled with codes like VFN on seed packets. Remove dead leaves immediately to prevent fungal growth.
Regular vigilance and simple methods keep pests at bay. By combining covers, natural sprays, and smart planting choices, your bucket garden stays healthy with minimal effort. A little prevention makes all the difference in growing strong, productive plants!
Harvesting and Maximizing Yields from Your Bucket Garden
Knowing when and how to harvest your vegetables is key. It ensures the best taste and keeps your garden growing. Small changes can make your garden a year-round source of fresh veggies. Follow these tips to get the most from your Backyard Vegetable Gardens.
When to Harvest Different Vegetables
- Tomatoes: Pick when fully colored and slightly soft to the touch.
- Zucchini: Harvest when 6-8 inches long to encourage new growth.
- Leafy greens: Snip outer leaves of lettuce and kale while leaving the center to regrow.
- Root crops: Carrots taste sweetest when their shoulders peek above soil; radishes left too long become bitter.
- Potatoes: Tip the container into a wheelbarrow to unearth tubers—this method avoids damaging roots in soil.
Succession Planting for Continuous Harvests
Keep your containers productive all season with these strategies:
- Sow leafy greens like spinach or arugula every two weeks for steady harvests.
- Replace spent lettuce plants with heat-loving veggies like beans once spring crops finish.
- Use square-foot gardening techniques to plant 16 small veggies in a single 1ft container, boosting yields by up to 100%.
Extending Your Growing Season
Protect your Backyard Vegetable Gardens through extreme weather:
- Move containers indoors or to sheltered porches during frosts.
- Wrap containers with row covers (floating fabric) to add 4-10°F of frost protection.
- Plant cold-tolerant crops like kale in late summer for fall harvests.
Track harvest dates in a garden journal to refine your timing each year. Small adjustments to harvesting and planting schedules can double your veggie output. Every bucket holds potential—now it’s time to unlock it!
Troubleshooting Common Issues in Bucket Vegetable Gardens
Even with the right setup, Vegetables In Pots and Small Vegetable Gardens can face setbacks. Here’s how to spot and fix problems before they affect your harvest:
- Yellowing leaves? Check soil moisture first. Overwatering drowns roots, while underwatering stresses plants. Test soil by poking 1 inch deep—if dry, water. For containers without drainage, add 4-6 holes in the bottom.
- Stunted growth? Roots may be cramped. Transplant into larger buckets if plants outgrow their space. Use 5-gallon buckets for tomatoes and peppers, and 2-gallon containers for herbs.
- Fruit drop or blossom rot? Tomatoes and peppers may need hand-pollination if bees aren’t visiting. Gently shake plants at bloom time or plant basil nearby to attract pollinators.
- Yellow leaves with green veins? Sign of nutrient deficiency. Feed weekly with diluted fertilizer (½ tsp per gallon of water) to replenish soil in limited volumes.

Weekly inspections help catch pests early. Check undersides of leaves for aphids or spider mites. Use neem oil sprays instead of harsh chemicals to protect beneficial insects. If plants wilt despite regular watering, repot them into fresh soil mix. Remember, small vegetable gardens thrive with consistent care—adjust watering, feeding, and spacing as plants grow. A little troubleshooting today means more homegrown veggies tomorrow!
Conclusion: Start Your Bucket Vegetable Garden Today
Starting a vegetable garden in buckets opens doors to Food Gardening even in small spaces. Imagine fresh tomatoes, herbs, and greens thriving on your balcony or patio—all with just a few buckets. This Vegetable Garden DIY approach turns limitations into opportunities. Let’s get started.
Begin by selecting buckets based on plant needs. Leafy greens like lettuce and herbs need 4–5 inches of soil depth. Carrots or peppers require 8–12 inches. The Cary Company offers colorful 5-gallon buckets perfect for this purpose.
Drill 4–6 drainage holes, then fill with a mix of peat, compost, and minimal topsoil. Choose sunlit spots—most vegetables need 6–8 hours of light daily. Herbs and leafy greens tolerate partial shade.
Plant seeds or seedlings, then water deeply. Use self-watering containers for convenience and check soil moisture daily, specially in summer. Fertilize every two weeks once plants bloom. Rotate crops seasonally and reuse soil if no diseases occur. Harvest often to encourage growth.
Even a single balcony can host multiple plants: try a tomato, two peppers, and herbs in one 2’x2’ setup. Join the growing urban gardening community where rooftops and patios become green spaces. Start small, experiment, and watch your efforts pay off.
With the right containers, sunlight, and care, you’ll enjoy homegrown produce in weeks. Every bucket garden contributes to self-reliance and sustainability—why wait? Grab a bucket today and join thousands of backyard innovators redefining Food Gardening one container at a time.
FAQ
What vegetables can I grow in buckets?
Do I need special buckets for growing vegetables?
How can I ensure proper drainage in my bucket garden?
What soil should I use for my bucket vegetables?
How often should I water my bucket vegetables?
Are there any pest issues specific to container gardening?
How can I extend the growing season for my bucket garden?
Can I reuse containers from other uses for my bucket garden?
What are the economic benefits of bucket gardening?
I’m a beginner. Can I still succeed with bucket gardening?
Source Links
- 12 Vegetables That Thrive in Containers, So You Can Grow Produce Almost Anywhere – https://www.marthastewart.com/container-vegetable-gardening-8672586
- 10 Vegetables To Grow in Buckets, Bags, and Baskets – https://www.almanac.com/10-vegetables-grow-buckets-bags-or-baskets
- Best Vegetables for Container Gardening – https://growinginthegarden.com/20-best-vegetables-for-container-gardening/
- Gardening in a Bucket: What You Need to Know – https://homegrownoutlet.com/garden-in-a-bucket/
- Here’s How to Grow a Plentiful Vegetable Garden in a Container – https://www.bhg.com/gardening/vegetable/vegetables/growing-vegetables-in-containers/
- What to Know About Container Vegetable Gardening – https://www.webmd.com/a-to-z-guides/what-to-know-about-container-vegetable-gardening
- Container Gardens vs Traditional Gardens – https://www.johnson.k-state.edu/programs/lawn-garden/agent-articles-fact-sheets-and-more/agent-articles/vegetables/Container Gardens vs Traditional Gardens.html
- Container Gardening: The Easiest Way to Grow — Sowing in Suburbia – https://www.sowinginsuburbia.com/blog/container-gardening-the-easiest-way-to-expand-your-home-vegetable-garden
- How To Grow Veggies In Pots And Planters At Home – https://www.gardeners.com/how-to/urban-gardening-with-vegetables/5491.html?srsltid=AfmBOoqJ8-cJ58gYMATwCsRvYdh_KgQJHc49g0Q_EsfteCuRE1tPDIlL
- Vegetable Gardening – the 6 essentials – Midwest Garden Gal – https://www.midwestgardengal.com/vegetable-gardening-the-6-essentials/
- How To Grow Vegetables in Containers, Pots, or Window Boxes – https://www.thepioneerwoman.com/home-lifestyle/gardening/g43836879/container-gardening-vegetables/
- The 5 Best Vegetables for DIY Container Gardening – https://my.aarpfoundation.org/article/diy-container-gardening/
- How to Mix Your Own Potting Soil for Container Vegetables – https://foodgardening.mequoda.com/daily/soil-fertilizer/how-to-mix-your-own-potting-soil-for-container-vegetables/
- Best Potting Soil for Vegetables in a Container Garden – https://ministryofthehomemaker.com/best-potting-soil-for-vegetables-in-a-container-garden/
- How to Water Your Square Foot Garden: 4 Methods That Work – https://squarefootgardening.org/2024/07/watering-methods-for-your-square-foot-garden/
- 10 Tips on How to Water Your Container Gardens – https://www.thespruce.com/watering-plants-in-containers-847785
- Drip Watering Tips to Keep Your Vegetable Garden Thriving – https://www.rainbird.com/homeowners/blog/drip-watering-for-vegetable-gardens
- Seven Habits for Organic Gardening | Gardener’s Supply – https://www.gardeners.com/how-to/managing-garden-pests-diseases/5064.html?srsltid=AfmBOooB8gkt2EBpHLWPyRFwQdoThwx9UwLnKx-hO6w-7HqN4bhgiRWu
- Organic Pest Control for the Garden – https://melissaknorris.com/podcast/organic-pest-control-for-vegetable-gardens/
- Organic Pest Control for a Vegetable Garden – https://home.howstuffworks.com/organic-pest-control-for-a-vegetable-garden.htm
- Planning Your Garden Layout: Maximizing Space and Yield – https://heinzbrothers.com/blogs/news/planning-your-garden-layout-maximizing-space-and-yield
- Maximizing Your Harvest: Succession Planting in Container Gardens — Green and Prosperous – https://www.greenandprosperous.com/blog/maximizing-your-harvest-succession-planting-in-container-gardens
- 12 Vegetable Garden Ideas To Maximize Yields And Enhance Your Growing Space – https://www.gardeningknowhow.com/edible/vegetables/vegetable-garden-ideas
- The Challenges of Growing Vegetables in Containers and How to Overcome Them – https://foodgardening.mequoda.com/daily/container-gardening/the-challenges-of-growing-vegetables-in-containers-and-how-to-overcome-them/
- Bucket Gardening: Grow A Mini-Garden Anywhere – https://cityblooming.com/bucket-gardening/
- 23 Container Gardening Mistakes That Can Harm Your Plants – https://homesteadhow-to.com/container-gardening-mistakes-that-can-harm-your-plants/
- How To Grow Veggies In Pots And Planters At Home – https://www.gardeners.com/how-to/urban-gardening-with-vegetables/5491.html?srsltid=AfmBOopNO70veF8giuaeGiF3Cv44FzENxKHJIz-wLysLhhBrKlmpL_Vq
- Best 5 Gallon Bucket Garden Ideas & Yard Uses – Articles & Resources – https://www.thecarycompany.com/insights/articles/best-5-gallon-bucket-garden-ideas-and-yard-uses?srsltid=AfmBOormD56mO7P1BAbNiWymw3bBYknT8ZT7lOShpmKOVpiLOCoDgdc5
- Container Vegetable Gardening – https://www.butler.k-state.edu/horticulture/agent-articles/vegetables/container-vegetable-gardening/untitled.html